
DXF/DWG to Gerber Conversion Guidelines
It is estimated over 10% of all PCB/RF electronic layouts are still designed using AutoCAD or other similar CAD tools (like SolidWorks, ProE, etc). Why?
The power of AutoCAD is that it supports a wide array of entities types which can be used to construct various electronic designs from the simplest PCB to the most extremely complex RF/Microwave circuit, MEMs design, chemical milling artwork, or other high-end electronic layout. Designers generally choose to layout their designs in AutoCAD when existing EDA/CAD tools do not possess the capabilities to meet unique geometrical requirements.
The initial approach is usually the same for a designer attempting to layout their electronic drawing in AutoCAD… “I’ll simply layout my design in AutoCAD (using whatever entity types I desire), export to a DXF file, and then convert the DXF to gerber data (using any DXF to Gerber converter)” – seems simple enough right? Wrong! This approach usually results in an astonished look on the designers face when the resulting gerber files are nowhere near their appearance in AutoCAD and not worthy of sending out for manufacturing. This has been a mystery which has plagued PCB/RF designers for well over 20 years, and the purpose of this document is to explain the and how to solve them resulting.
Note: Most PCB board shops won’t touch your DXF/DWG data with a 10 foot pole and ask that you provide them only with the Gerbers and drills – which is probably why you are reading this article in the first place :)
Gerber Basics:
To figure out the problems and how to overcome them, first lets look that the format you want to convert your AutoCAD drawing to: Gerber. The Gerber format is well over 35 years old and is simply an ASCII text file containing X,Y coordinates, and shapes (i.e apertures/dcodes). For more information about Gerber, visit the following link: http://www.numericalinnovations.com/gerber.html
DXF/DWG Basics:
DXF stands for Drawing Exchange Format, and it is a format for transferring drawings between Computer Aided Design systems. DXF is widely used as the de facto standard in the engineering and construction industries. The DXF format is a tagged data representation of all the information contained in an AutoCAD® drawing file. Tagged data means that each data element in the file is preceded by an integer number that is called a group code. A group code's value indicates what type of data element follows. This value also indicates the meaning of a data element for a given object (or record) type. Virtually all user-specified information in a drawing file can be represented in DXF format. DWG is essentially a binary version of DXF which tends to be smaller and cause less parsing errors during conversions.
Unlike the old Gerber format, every year you can expect there’s going to be a new release of AutoCAD and with each release there are usually changes to the entity types, DXF/DWG format, which continuously pose compatibility issues and other problems. More recently cross-over from 32-bit to 64-bit versions has become prevalent – causing more compatibility issues.
Keep your Drawings simple (Using 5 Fundamental Entities)
The easiest way to convert AutoCAD drawings to gerber is to keep things simple. DXF/DWG files support hundreds of various entity types (like Hatches, Blocks/Inserts, 3D objects, Tapered Polylines, TrueType fonts& Mtext, Splines, Regions, Model/Paper Space, and much more), so the question remains how do we convert those fancy entity types into a simple gerber file which only contains X,Y coordinates, and shapes (i.e apertures/dcodes) – Simple, for best results create your layouts using the 5 fundamental DXF/DWG entities that will lead to successful gerber conversions.
What are the 5 fundamental DXF/DWG entities?
Polylines (or LW Polylines), Circles, Text, Blocks, Inserts. Believe or not, you can create just about any PCB/RF layout using only these 5 entities, and they most closely represent objects in Gerber data.
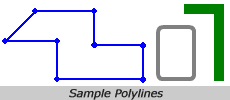
Polylines (or LW Polylines): A series of connected lines and arcs than may have varying widths. This is the most common entity used to construct a PCB/RF layout and is used in about 80% of the layout. Polylines with width are used to draw traces (i.e. tracks) to connect pads. Polylines with 0-width are commonly used to create filled boundaries. Polylines may also be used to created square and donut pads.
Circles: Most commonly used to draw round pads.
Text: Used to draw silkscreen and labels. Typically using stick fonts which are AutoCAD compiled fonts (SHX) provide the best results, and are output as trace segments in gerber. Many DXF to Gerber conversion tools may support TrueType fonts, however be careful that internal shape appear.
Blocks / Inserts: Typically used to create a hierarchy in your design, and provide an optimized method to add repeated entities into your drawing. Blocks are essentially individual drawings that are inserted into a parent drawing. During the insertion, blocks can be rotated, scaled, and transformed in any direction. Blocks can be inserted multiple times as and array using Minsert (Multiple Inserts) which allows an array of blocks either rectangular or polar.
Answers to the most common DXF to Gerber Pitfalls.
How do I created a filled area in my Gerber file?
To create a filled area, first draw a closed, continuous boundary (with 0-width polyline) that does not self-intersect. Remember gerber has stringent fill rules: All boundaries must be continuous, with no overlapping or self-intersections (like a bow-tie). The direction is not significant for filled boundaries (i.e clockwise or counter-clockwise).
In Gerber, my boundaries are still not filled, why?
Most likely your boundaries are not closed & continuous (as described above). In many cases you may have a drawing which consists of individual line and arc segments – which are not continuous. We recommend that you convert those boundaries to Closed, 0-width polylines using the command “Pedit” and then select “Join”.
How do I create a Clear Area (i.e Island) inside a filled Polygon?
In the gerber format, there is no such thing as island/hole detection. Fortunately Gerber data supports Composites which allow you to explicitly define what to make clear or dark using the gerber commands “LPD” (Layer Polarity Dark) and “LPC” (Layer Polarity Clear). The most reliable way to define a composite gerber file, is to create separate DXF layers for each polarity change. For example: If you require a dark rectangular boundary with many clear holes, you should create two layers:
One layer which contains only the rectangular boundary, and a second layer which only contains the holes. During DXF to Gerber conversion you can create a composite gerber merge and assign the polarity for each layer.
Note: Some conversion tools will have a featured called “Polygon De-Embedding”, where the conversion tool will decipher which objects are contained inside of other objects and logically try to determine what should be an island or hole and then explicitly output that information to the gerber file.
Should I use Solid Hatch to fill an area?
Whenever possible refrain from using solid hatches in your AutoCAD drawing. Why? Solid hatches look good in AutoCAD because they are the one of few entities in AutoCAD that appeared filled (on the AutoCAD screen). But remember a solid hatch is drawn on top of your existing drawing, causing duplicate data in the DXF, and results from a Gerber conversion can be messy because of the duplicate objects. If you must use solid hatches, please make sure your conversion software supports solid hatching and has the ability to detect islands/holes when necessary.
How should I view the Gerber files after the DXF to Gerber conversion?
We recommend using a commercial grade Gerber Viewer/Editor like FAB 3000.
Have more questions? Feel free to contact us directly: support@numericalinnovations.com
By Simon Garrison
http://www.numericalinnovations.com